Knowledgebase
Map your domain to Blogger
Mapping your domain is an important part of Domain of One's Own; it reinforces the idea that you don't necessary need to host all your own applications. You should, however, be mindful of making your web presences part of a domain you control. If you would like to map a subdomain and have not yet created it, use this tutorial on creating subdomains before proceeding. To map your domain, or a subdomain, to Blogger, use these steps:
- To get started you'll need to login to your control panel by going to the UMW Domains homepage and clicking Login.

- Here you'll login with the username and password that was provided to you with the Welcome email during the signup process.

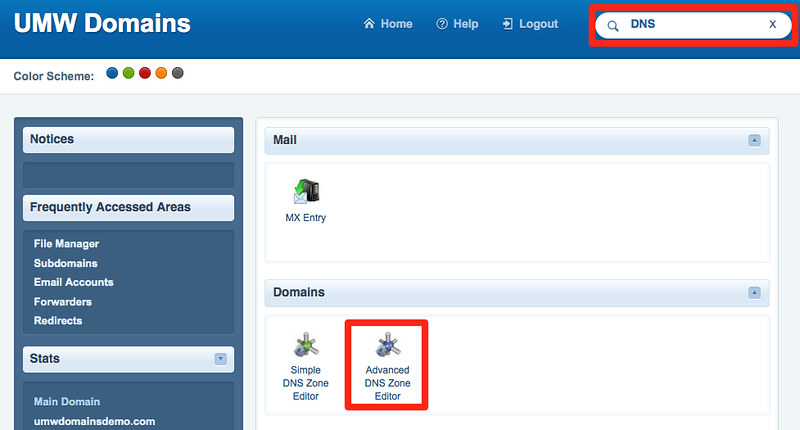
- Once logged in you'll be at the homepage of your control panel. The easiest way to navigate the panel is using the search feature in the top right panel. Click the Search box and type "DNS" (without the quotes). As you type, the cPanel page will begin to narrow down results. Find and click on Advanced DNS Zone Editor to continue.
- Find the domain, or subdomain, you want to map to Blogger in the list of Zone File Records. Under the "Action" column, click Edit.

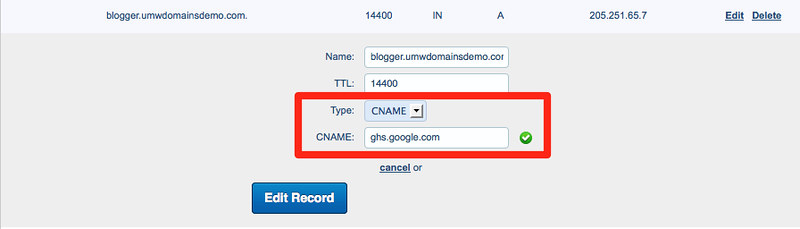
- Leave the Name and TTL fields set to their defaults. Update the Type field to CNAME, and the Address field to ghs.google.com. Click Edit record when you are done. Keep this window open; you will need it in later steps.
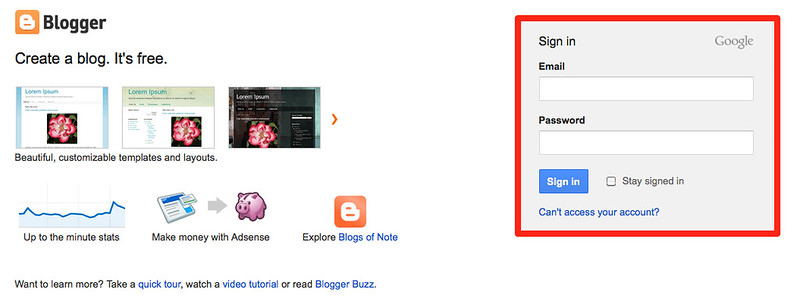
- In a new window or tab, go to the Blogger website, and log in with your Blogger / Google username and password.
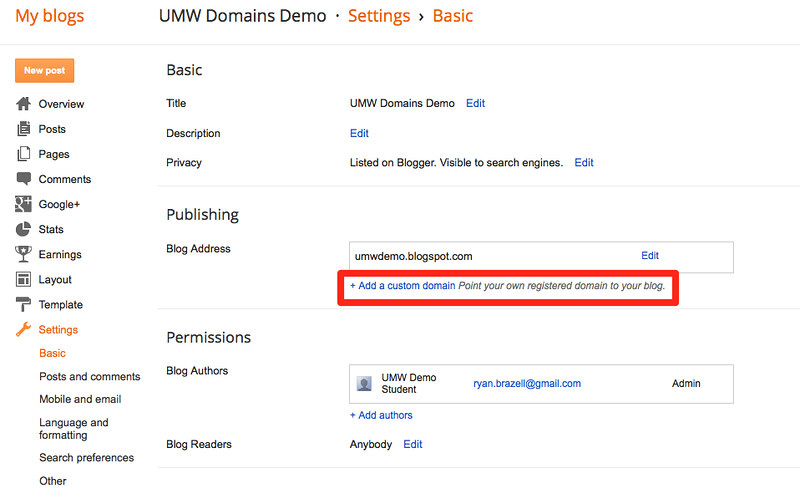
- From your Blogger Dashboard, find the blog you'd like to use, expand the More Options menu, and click Settings.

- On the "Basic Settings" page, find the Publishing section, and click the Add a custom domain link.
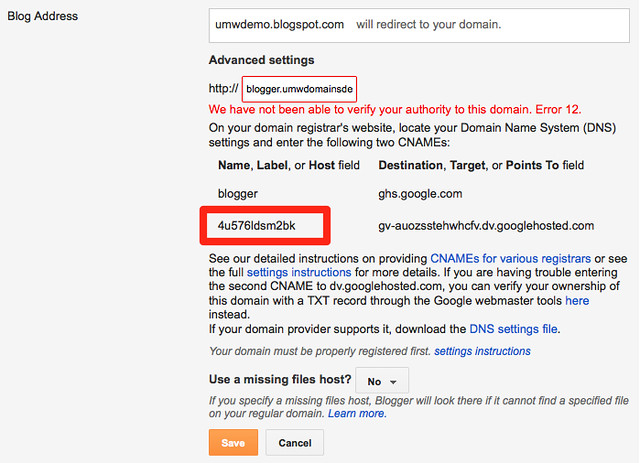
- Under "Advanced Settings," type the full subdomain or domain you are mapping into the box, leave the Use missing files host? option set to no, then click Save.

- You will be presented with a message that your domain cannot be verified, along with information about your existing DNS entry, and an additional DNS entry that needs to be made. This is normal. Copy the second entry under the "Name, Label, or Host entry" to your clipboard.
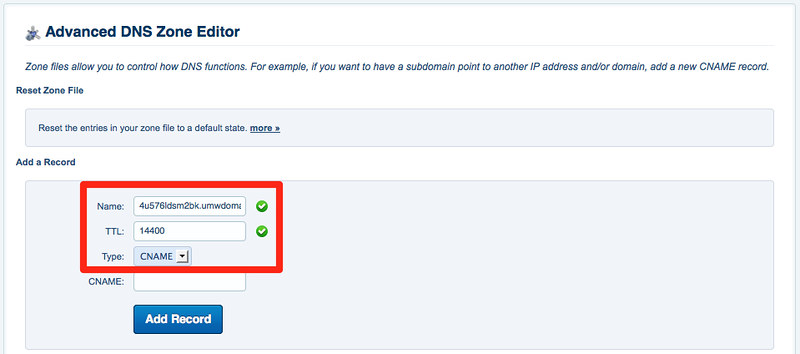
- Go back to the window or tab containing the "Advanced DNS Zone Editor" in your UMW Domains cPanel. In the "Add a Record" section, paste the text you just copied into the Name field. This information will be different for each domain. Set the TTL field to 14400, and the Type drop-down menu to CNAME.
- Go back to the window or tab containing the Blogger Advanced settings panel, and copy the second entry under the "Destination, Target, or Points to" column to your clipboard.
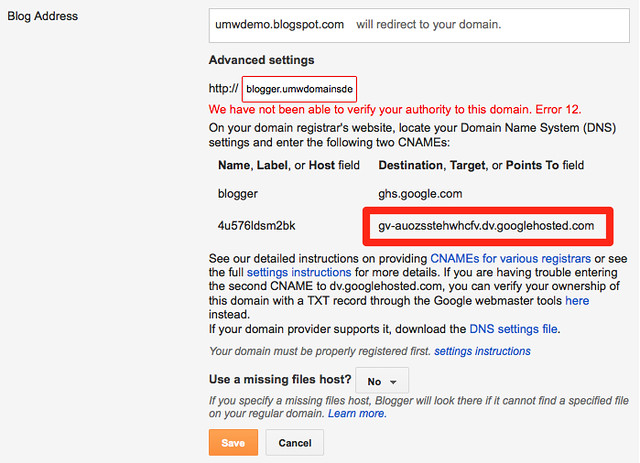
- Go back to the window or tab containing the "Advanced DNS Zone Editor" in your UMW Domains cPanel. In the "Add a Record" section, paste the text you just copied into the CNAME field. This information will be different for each domain. Click Add record when you are done.

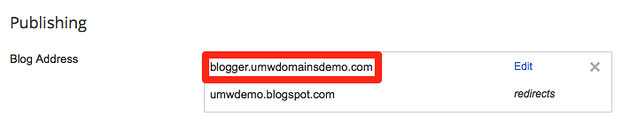
- Return to the window or tab containing the Blogger Advanced settings panel, and click Save.

- If everything was successful, your domain will now appear as the Blog Address. Keep in mind that it may take up to 72 hours for your domain or subdomain to correctly point all visitors to the correct location.
 Add to Favourites
  Print this Article
Also Read
- Accessing your Files through the File Manager (Views: 1829)
- Map your domain to UMW Blogs (Views: 1532)
- Map your domain to Tumblr (Views: 4193)
- Introduction to cPanel (Views: 2750)
- Map your domain to Tumblr (Views: 4193)